- Flask
- AWS ECS
- Fargate
- NGINX
- Docker
How to Deploy a Flask Application Using NGINX on AWS ECS — Part 3
Create the ECS cluster, task definition, service, security group, and load-balanced deployment that completes the Flask and NGINX series.

In the previous part, we successfully created our VPC Architecture. Now it is time to start building our AWS ECS Cluster.
Steps:
-
Create AWS ECS Cluster
-
Create AWS ECS Task Definition
-
Configure AWS ECS Service Security Group
-
Create AWS ECS Service
-
Confirm if our application is running
-
Create AWS ECS Cluster
Navigate to the Elastic Container Service page in AWS Management Console, and disable the New ECS Experience:
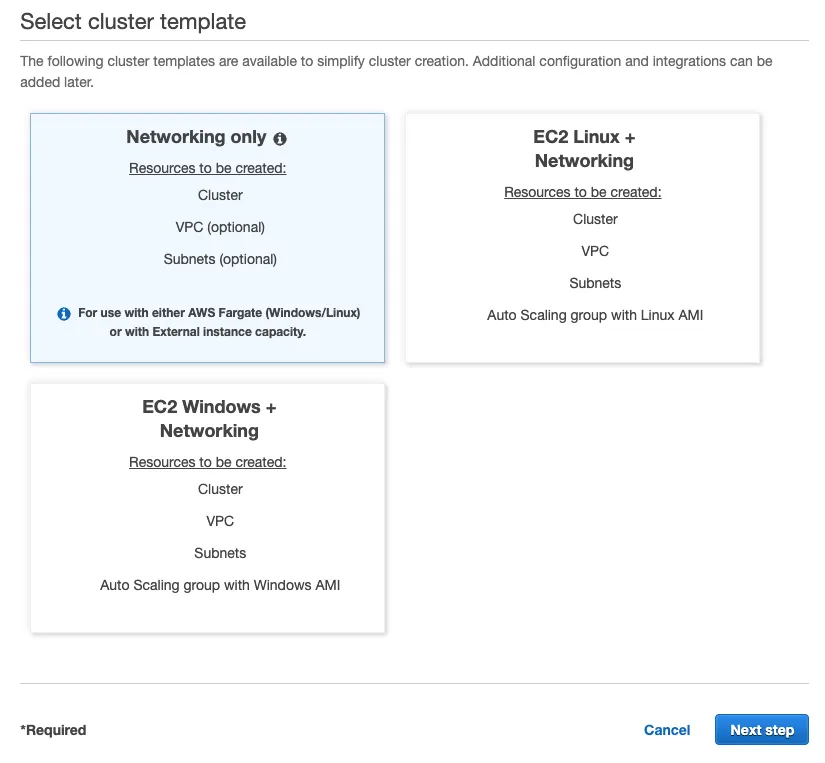
Click on Clusters in the left sidebar and then click on Create Cluster and select as cluster template Networking only and click on Next step:
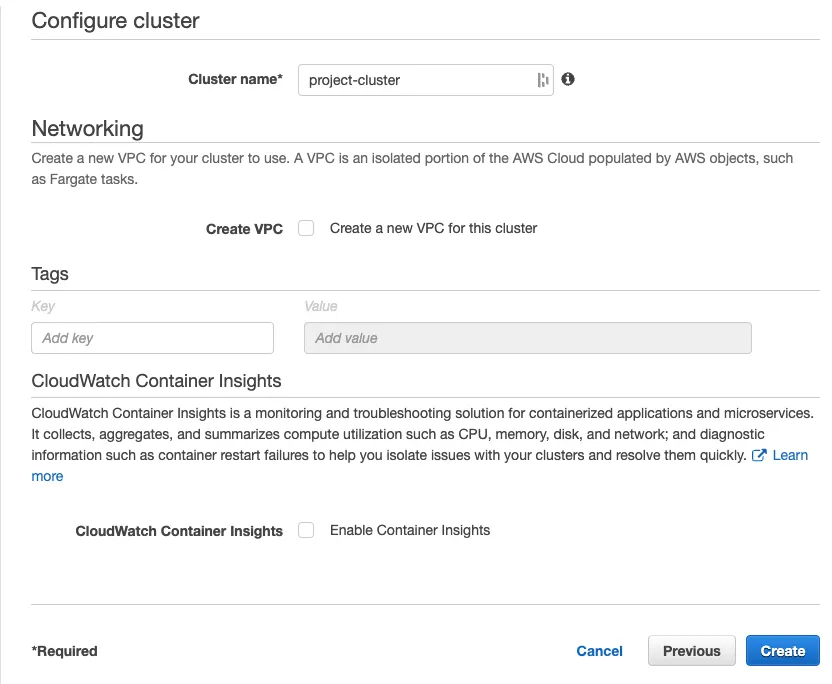
Name cluster as project-cluster and click on Create:
- Create Task Definition
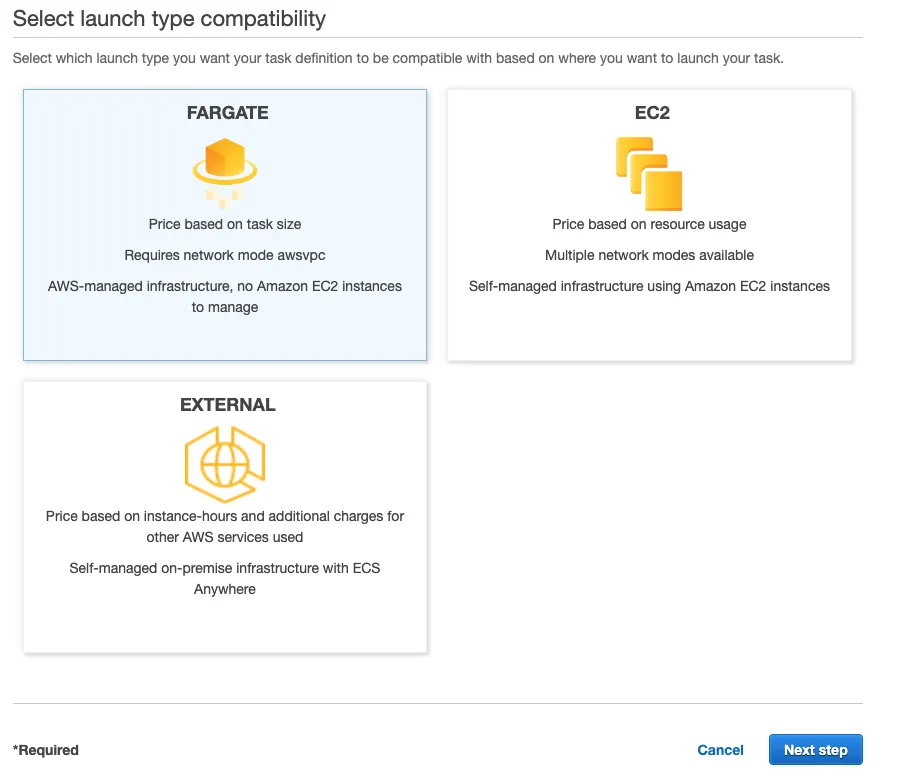
In the left sidebar, click on Task Definitions and then click on Create new Task Definition and select FARGATE as Launch type compatibility and click Next step:
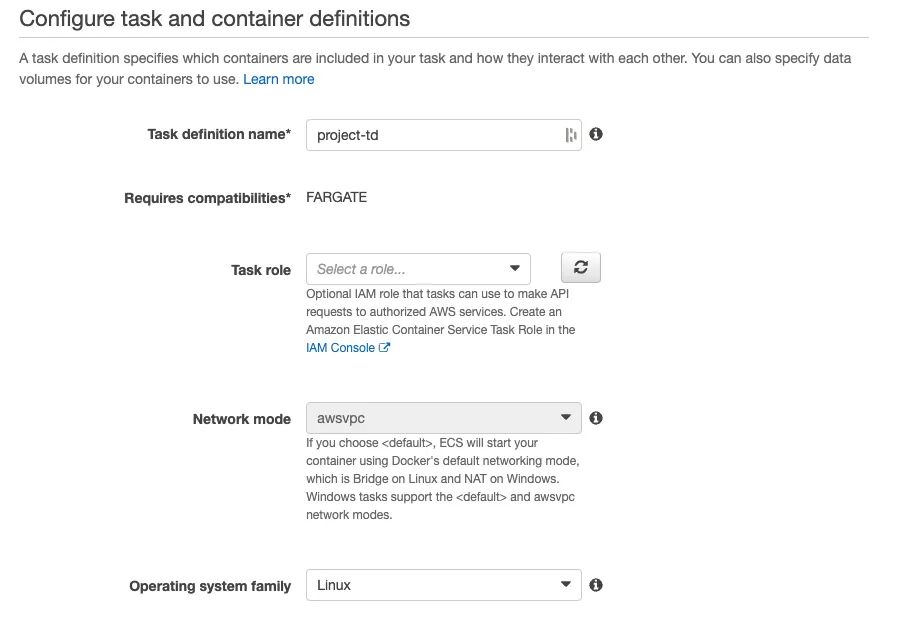
Give the name project-td to your Task Definition and select Linux as the Operating system family:
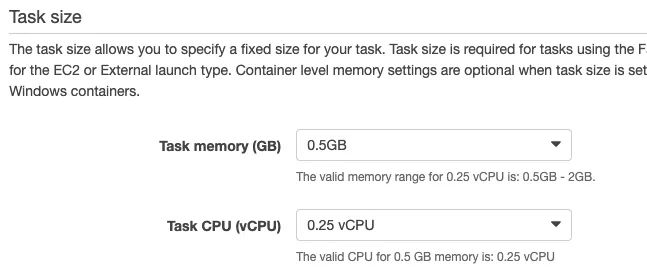
As Task size, select 0.5GB as memory and 0.25 as CPU:
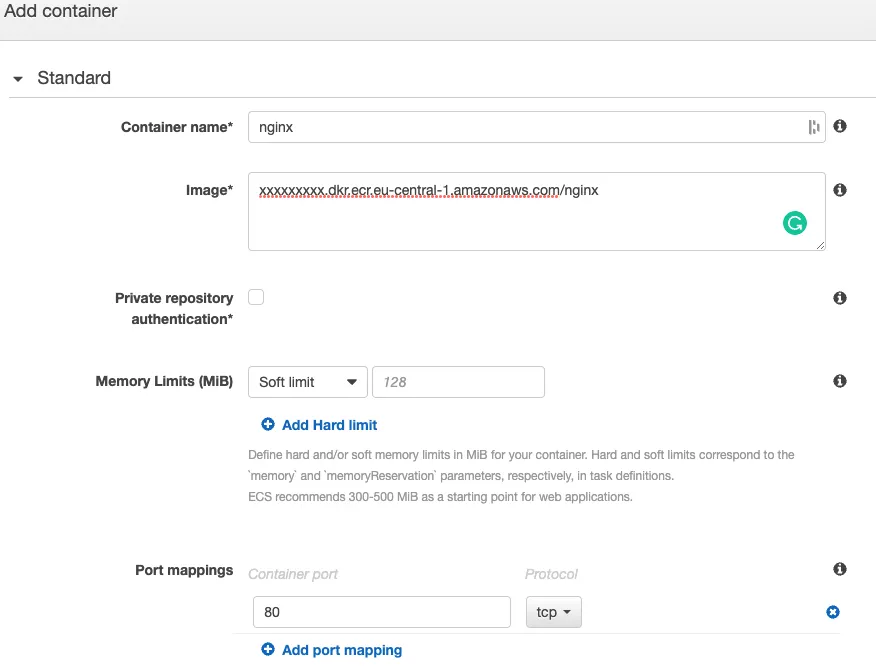
Open another tab on your AWS ECR service page and get the URI for each image created, in this case, nginx and project.
Back to the Add container page, name the first container name nginx, andpost the URI for your nginx image in the image section. In Port Mappings, add the 80 port:
Click on Add.
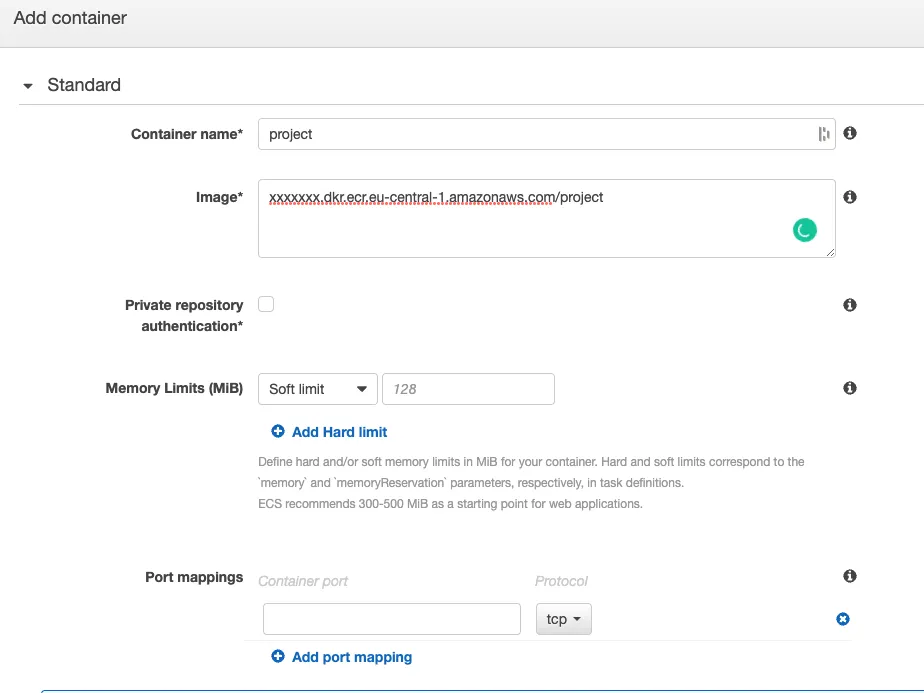
Repeat the process but now for our Flask Application (project):
Click on Add.
To finish the creation of our Task Definition click on Create.
3. Configure AWS ECS Service Security Group
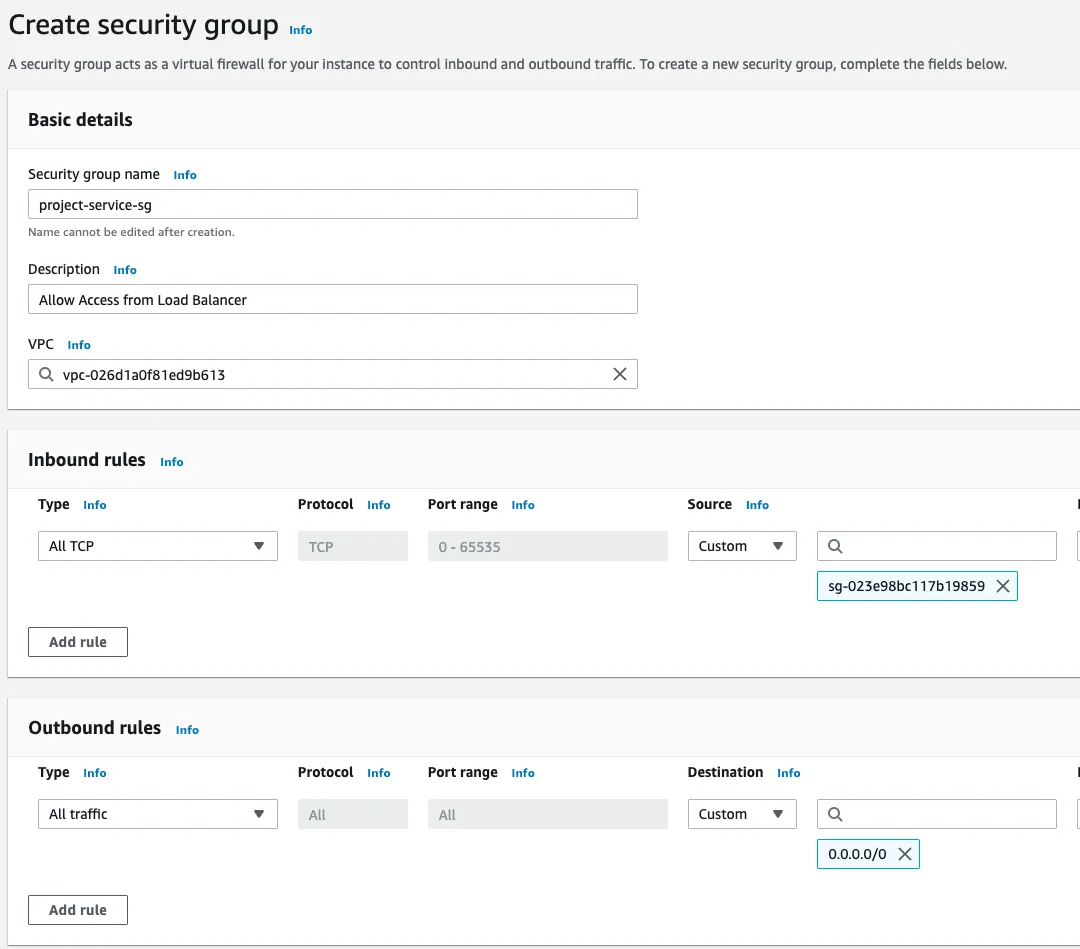
Navigate to the VPC page in AWS Management Console, and click on Security Groups. Click on Create security group.
Give it the name of project-service-sg, and on the Inbound rules section, select All TCP as the type, and in the Source, select the project-alb-sg
- Create AWS ECS Service
Go back to the Clusters page and click on your cluster:
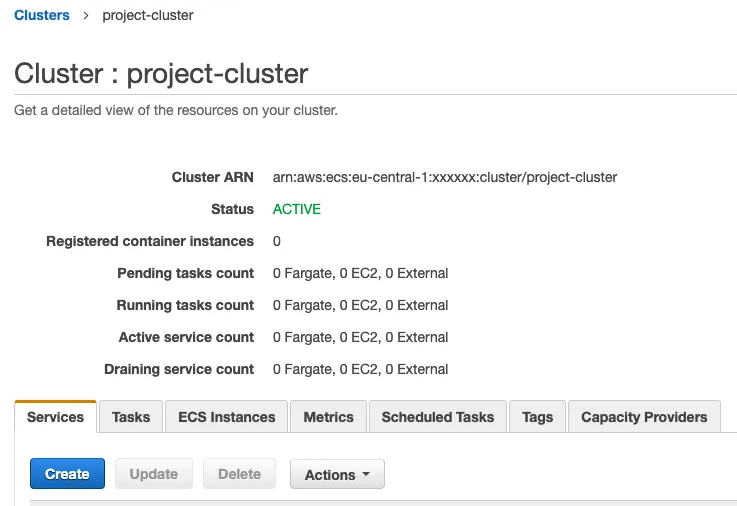
In the Service tab click on Create.
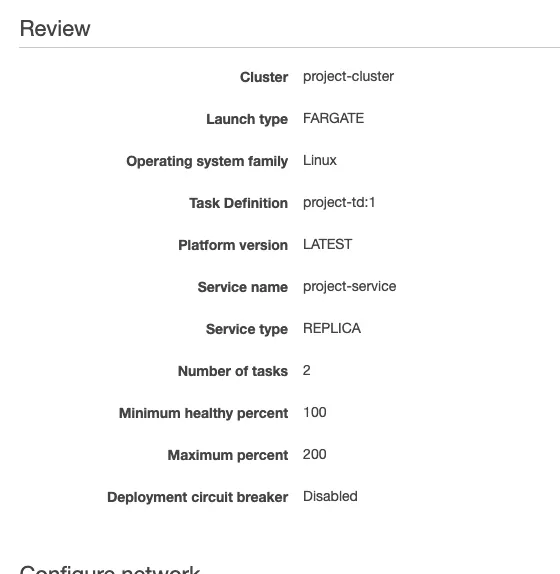
Select FARGATE as Launch type, and as Task Definition, select the one we created in the previous step, name your service project-service, and the Number of tasks set it to 2.
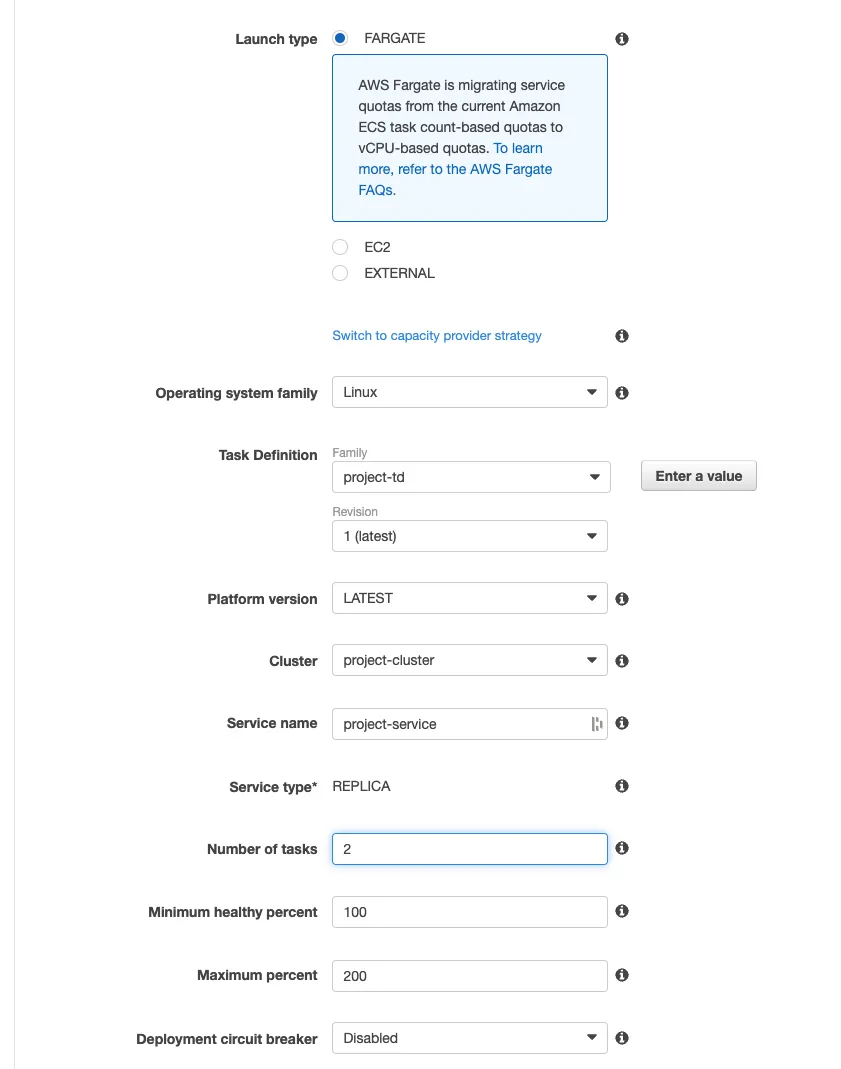
Click on Next Step.
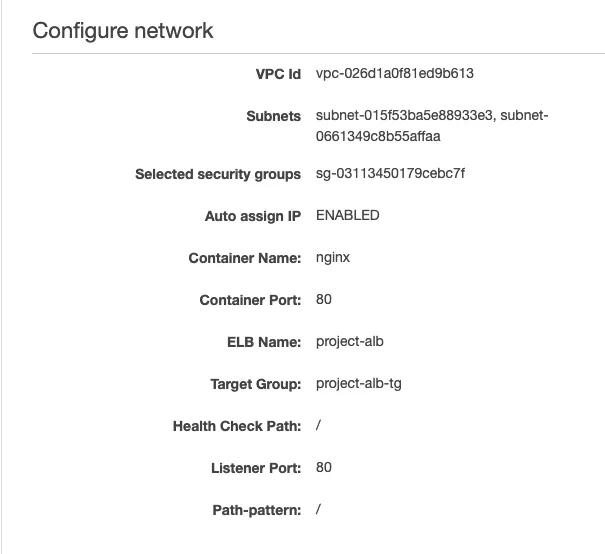
Choose our VPC as the Cluster VPC, and as subnets, select the project-private-rt-a and project-private-rt-b
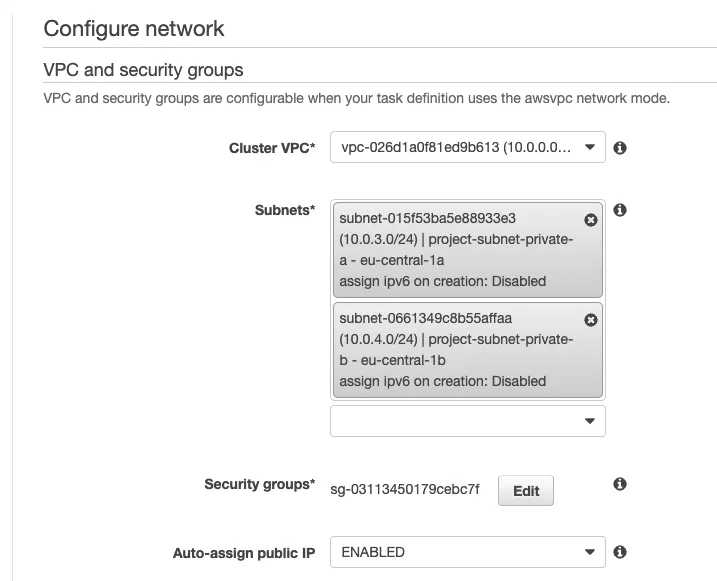
As Security Group, click on Edit, choose the one created in Step 3, and then Click on Save.
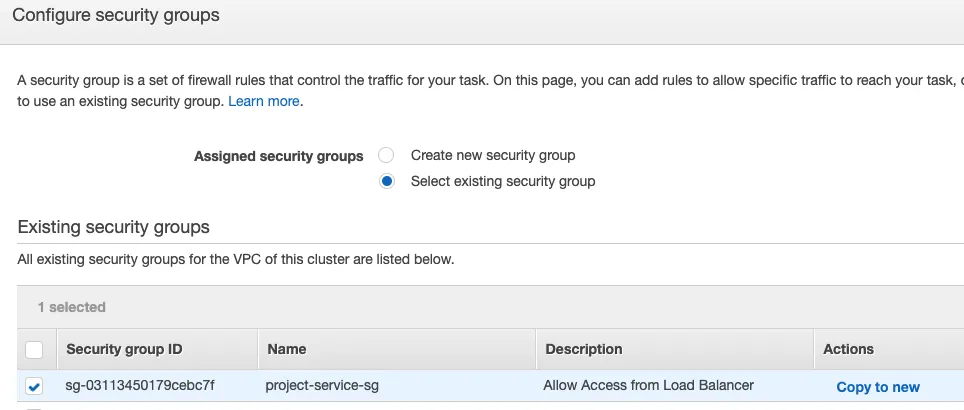
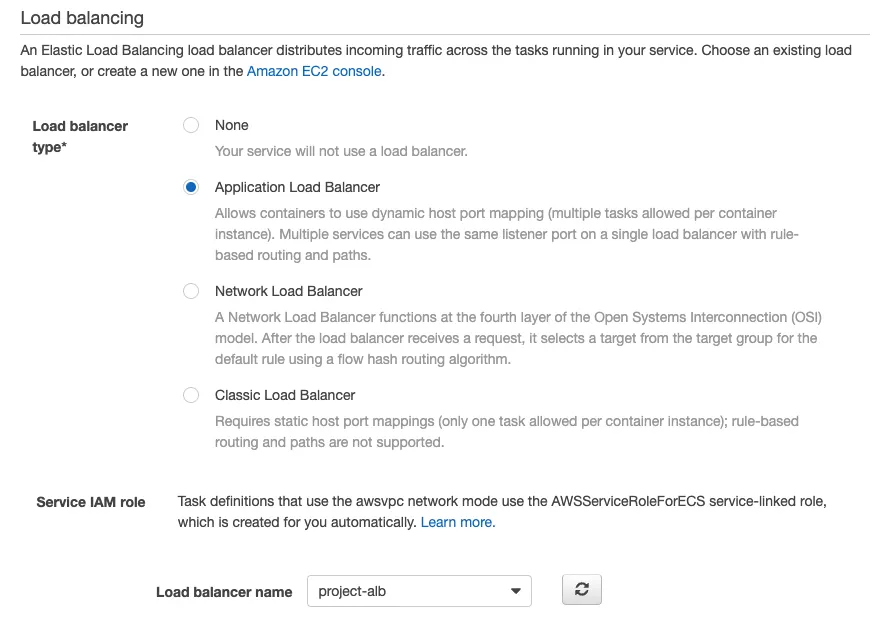
In the Load balancing section, select Application Load Balancer as the type. The Load balancer name should be the one we created in the last part:
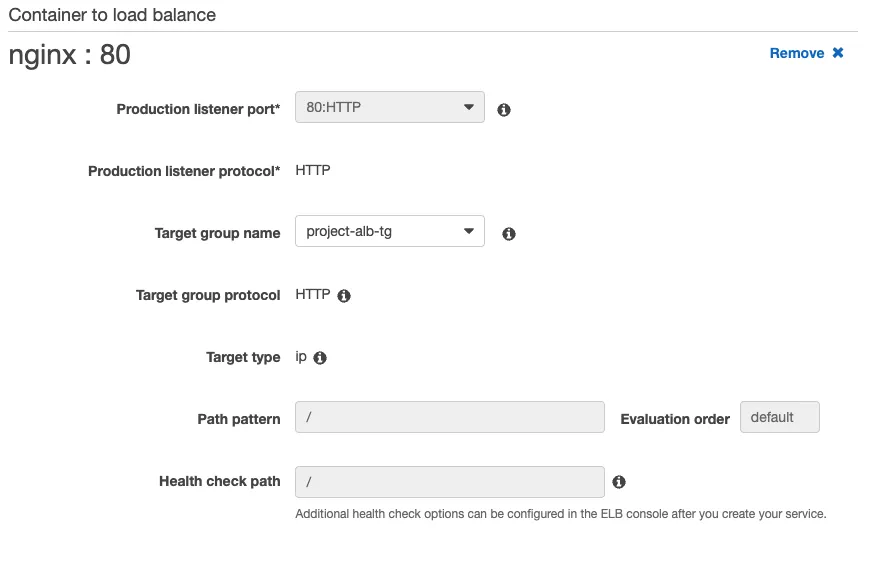
In the Container to load balance section, click on Add to load balancer:

As Target group name, select project-alb-tg:
Click on Next step and Next step, and you should see a review of what we just did:
To finalize, click on Create Service.
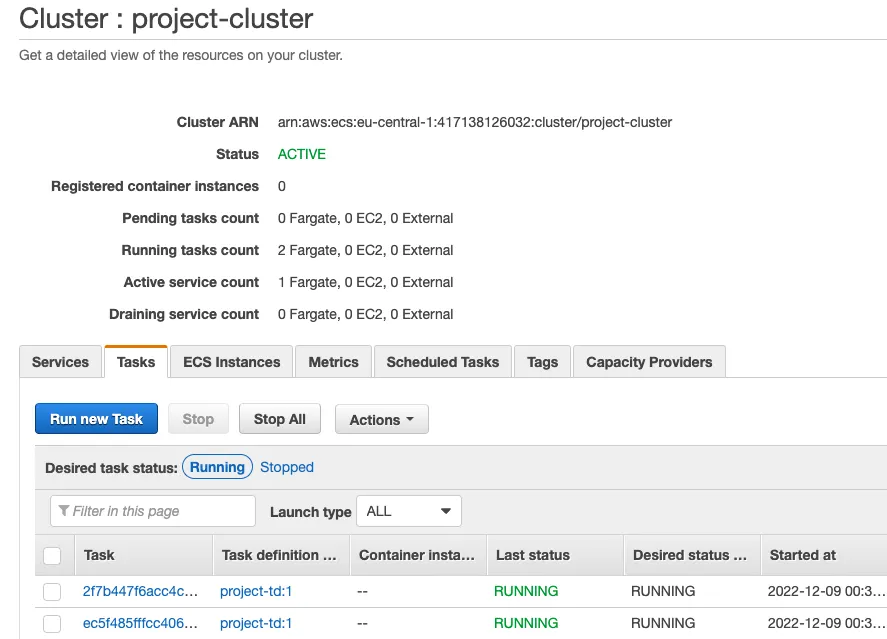
Go back to the Cluster page, and you should see two tasks running:
- Confirm if our application is running
Please navigate to the EC2 page in AWS Management Console, click on Load Balancers, andcopy the DNS name of our load balancer.
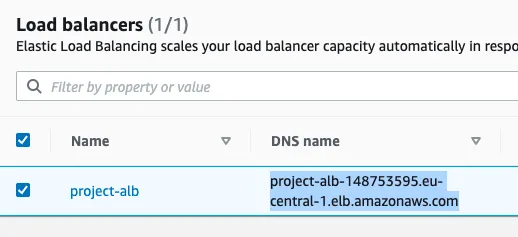
Open a new tab in your process and paste the URL you copied.

And that’s it; as you can see, you are accessing your Flask application directly from the Internet while NGINX is redirecting the requests internally inside the AWS ECS Service.
And since we deployed our Service with two replicas, we have each one in different subnets.
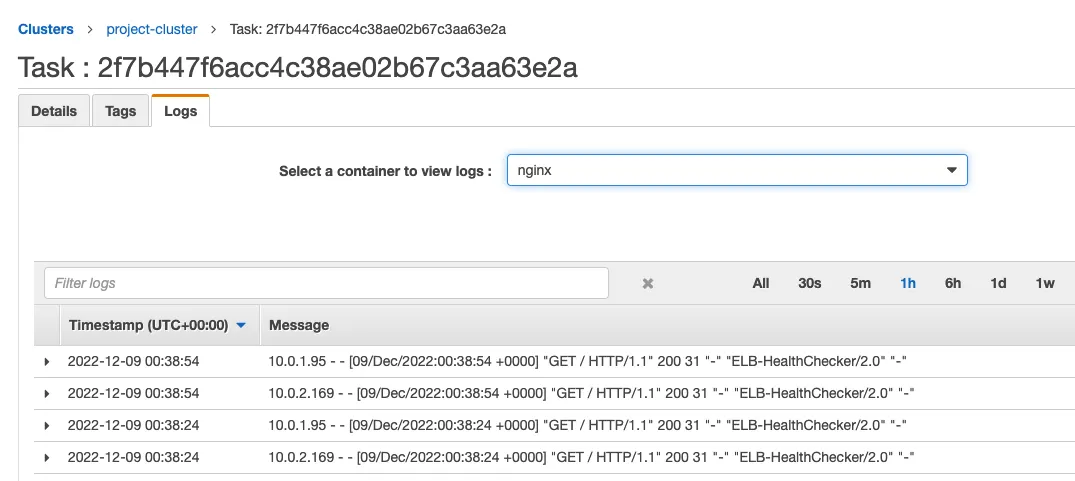
Now go back to your Cluster page, open the two Tasks in different browser tabs**, click** on the Logs tab, and select the nginx container.
Refresh your application browser tab many times, and you will see that our Load Balancer is working correctly and redirecting the traffic to our Tasks.
That is it from me; thanks a lot for reading!
If you enjoyed my content and my three-part series on “How to deploy a Flask application using NGINX on AWS ECS,” or if you have any questions, feel free to connect with me on Twitter https://twitter.com/AutomationForge