- Flask
- AWS ECS
- Fargate
- NGINX
- Docker
How to Deploy a Flask Application Using NGINX on AWS ECS — Part 2
Push Flask and NGINX images to Amazon ECR, then build the VPC, networking, and load balancer required for an ECS deployment.
In the previous part, we built our images successfully. Now you’re ready to move on to the next level — pushing the images to AWS ECR and creating our AWS Architecture.
Steps:
- Create and publish our images on AWS ECR
- Configure AWS CLI
- Push images to AWS ECR
- Create VPC and Subnets
- Create Internet Gateway
- Create NAT Gateway
- Create Route Tables and configure subnet associations
- Configure Routes
- Create an Application Load Balancer
1. Create and Publish our images on AWS ECR
Sign in to your AWS Management Console and navigate the ECR service page.
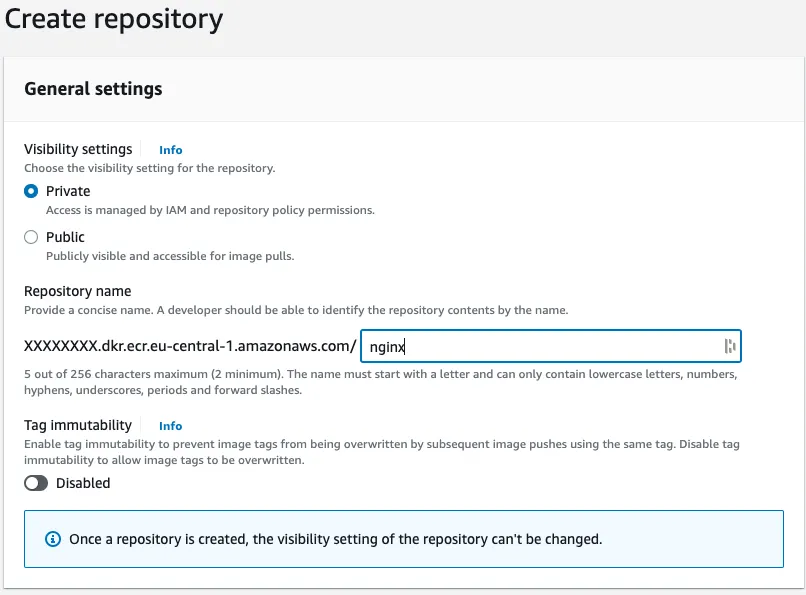
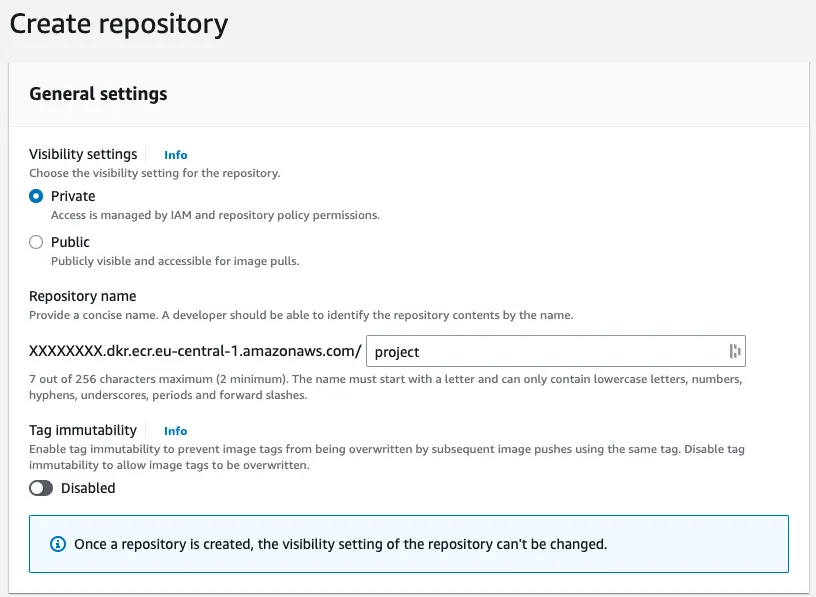
Create two repositories in ECR by clicking the “Create repository” button and providing a name for the repository. In this case, it will be nginx and project.
- Configure AWS CLI
Install the AWS CLI on your local machine if you haven’t done it already. You can do this by following the instructions in the AWS documentation: https://docs.aws.amazon.com/AmazonECR/latest/userguide/getting-started-cli.html
Configure the AWS CLI by running aws configure and providing your AWS access key ID and secret access key.
Use the aws ecr get-login command to obtain an authentication token for pushing images to your ECR repository.
Run the authentication token command that was returned by the aws ecr get-login command to authenticate your local Docker client with your ECR repository.
3. Push images to AWS ECR
If you run the command docker image ls you should see our built images:
REPOSITORY TAG IMAGE ID CREATED SIZEnginx latest 52193a0b99b7 2 hours ago 135MBproject latest 7eb7314e8e5e 2 hours ago 142MB
Open your AWS ECR service page again and get the URI for each repository created:
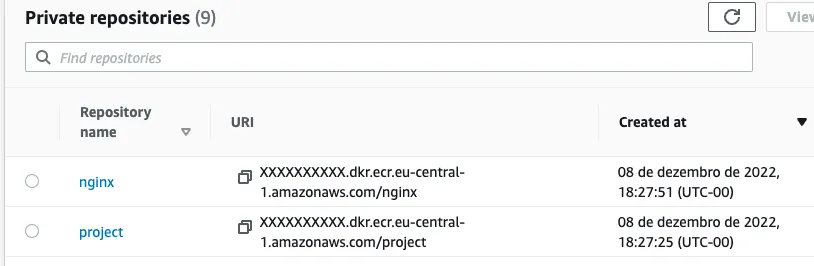
Now, back to the terminal, run the following commands replacing the URI that corresponds to each image:
docker tag nginx:latest XXXXXXXX.dkr.ecr.eu-central-1.amazonaws.com/nginxdocker tag project:latest XXXXXXXX.dkr.ecr.eu-central-1.amazonaws.com/projectdocker push XXXXXXXX.dkr.ecr.eu-central-1.amazonaws.com/nginxdocker push XXXXXXXX.dkr.ecr.eu-central-1.amazonaws.com/project
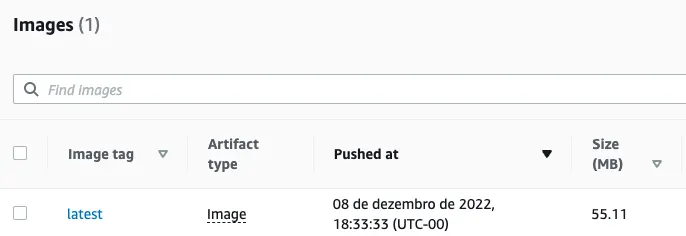
If you open the repositories on the AWS ECR service page, you should see the image tag inside:
4. Create VPC and Subnets
Navigate to the VPC page in AWS Management Console and click on Create VPC,and name it project-vpc with the following IPv4 CIDR block:10.0.0.0/21
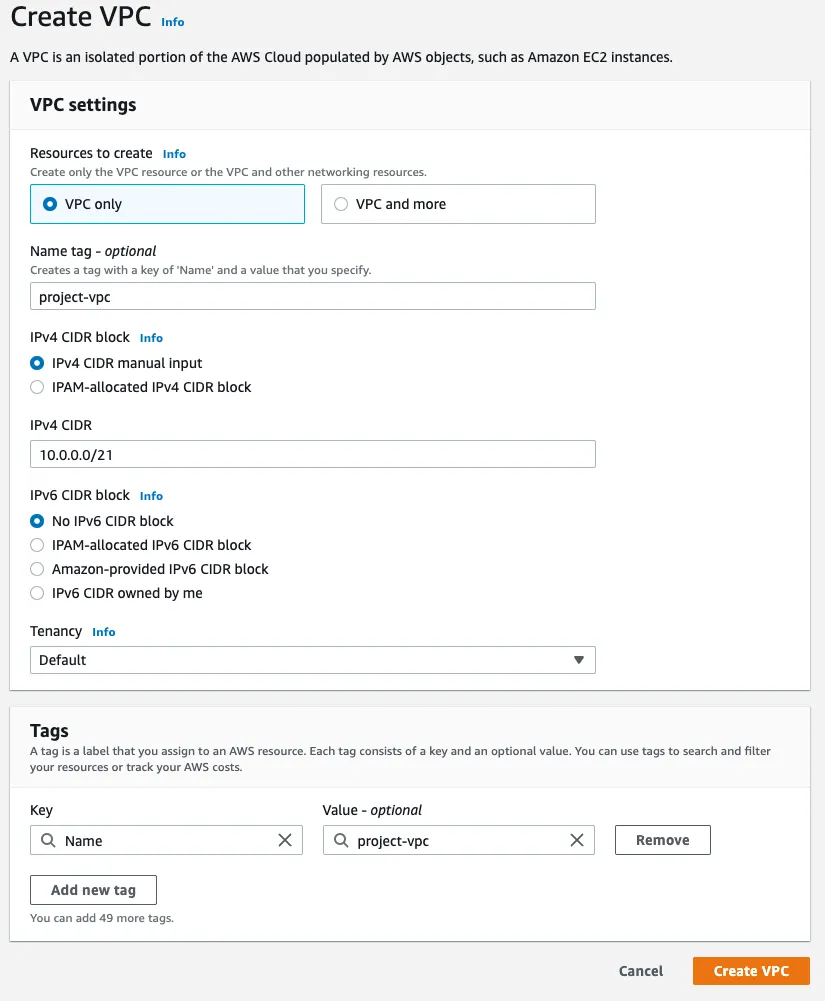
Now, on the VPC page, click on Subnets and then click on Create subnet.
Create one public subnet and one private subnet in the same availability zone (eu-central-1a) and one public subnet and one private in the same availability zone (eu-central-1b) with different IPv4 CIDR blocks as displayed below and then click on Create subnet.
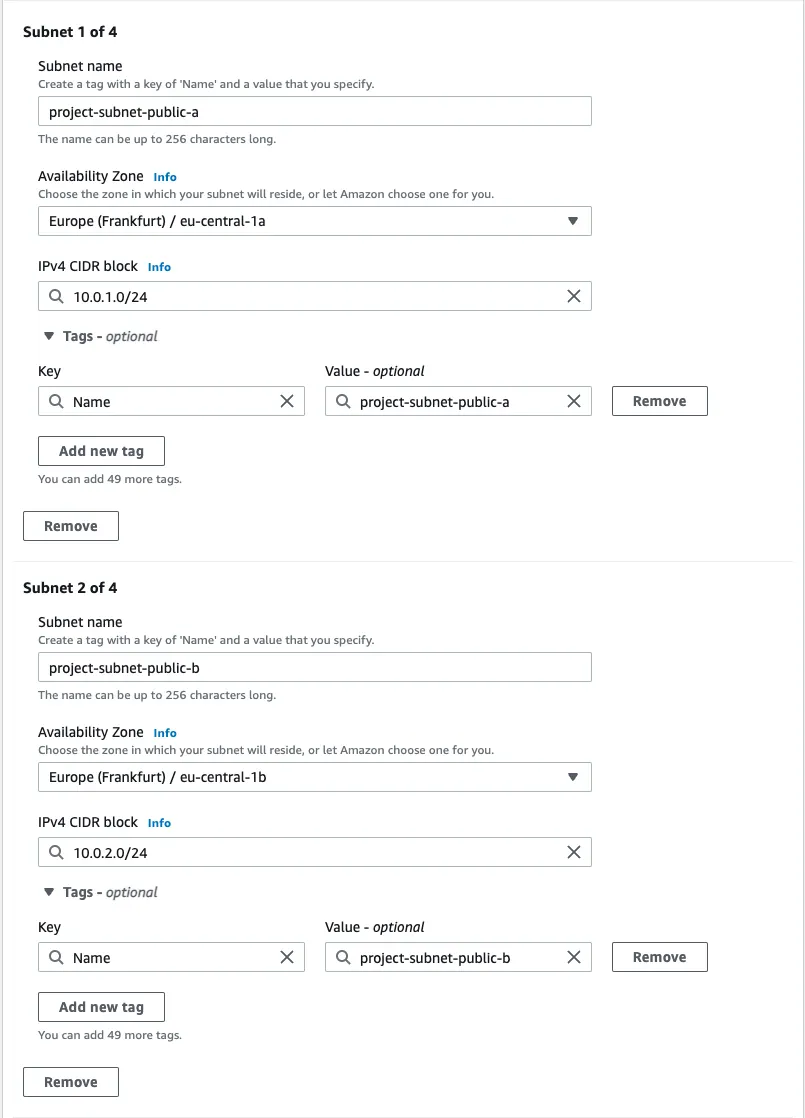
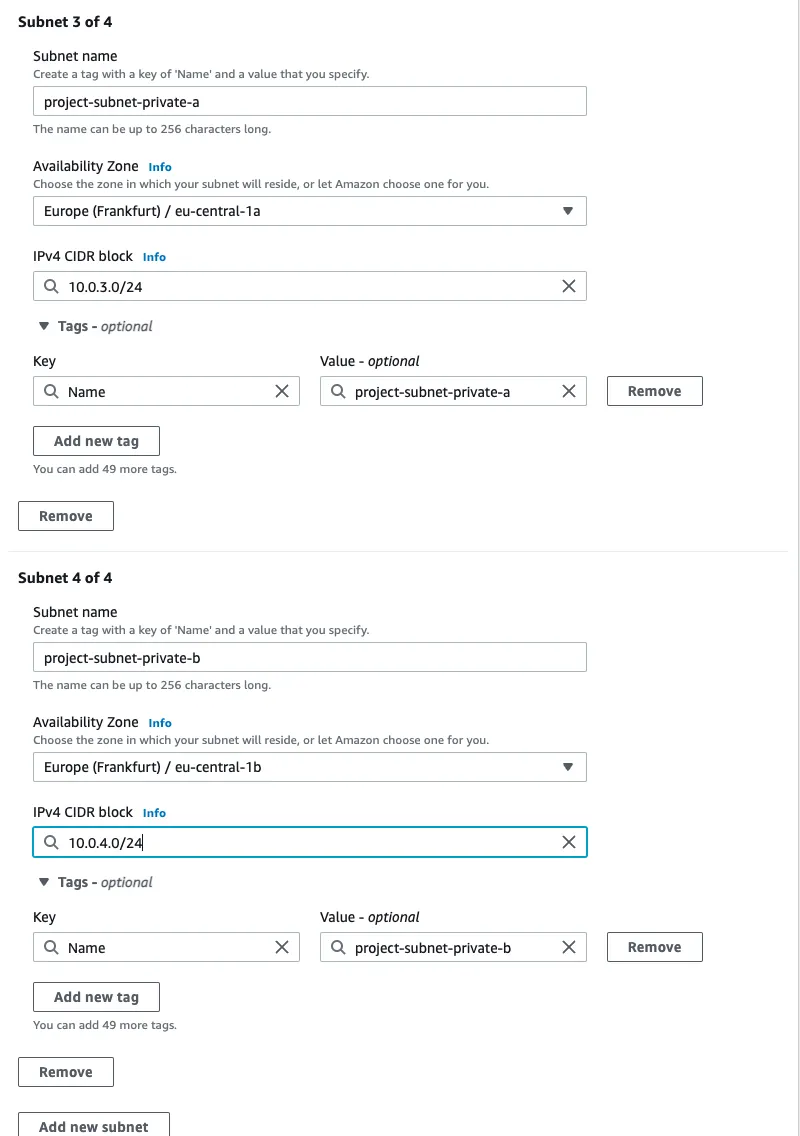
5. Create an Internet Gateway
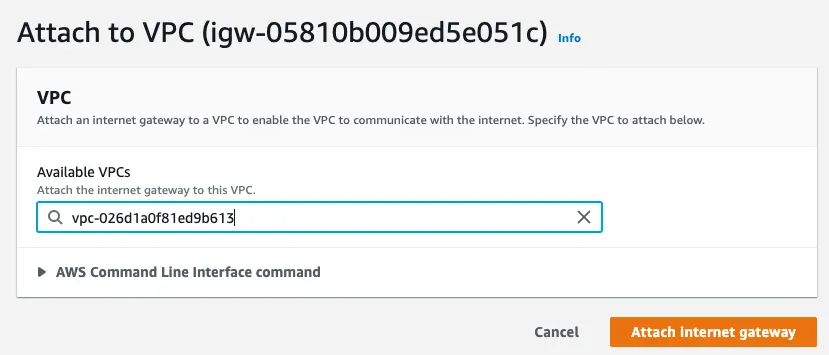
Navigate to the VPC page in AWS Management Console, go to Internet Gateways, and click Create Internet Gateway. Name it project-igw.
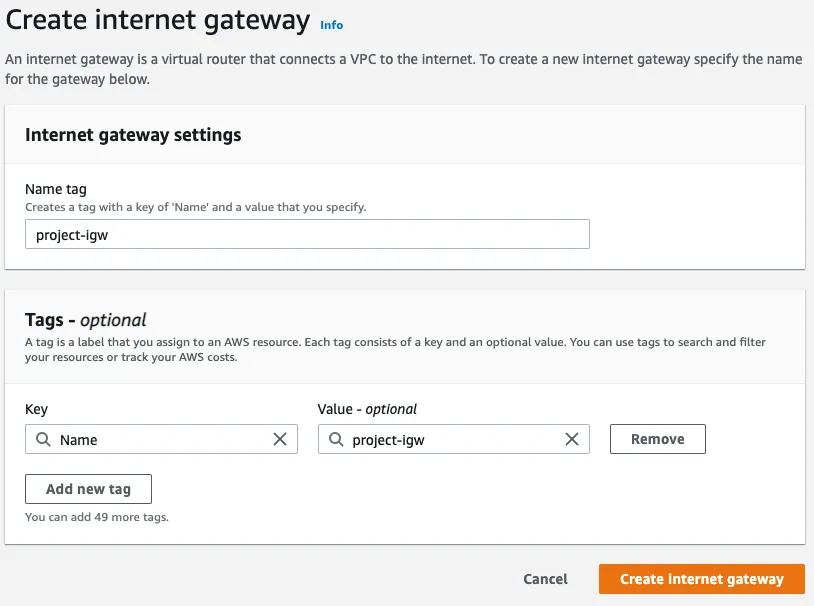
Then, attach the Internet Gateway to our VPC:

- Create NAT Gateway
Navigate to the VPC page in AWS Management Console, go to NAT gateways, and click on Create NAT gateway.
The NAT Gateway should be named project-nat-gw-1 and project-nat-gw-2 and be in the respective public subnet as displayed below:
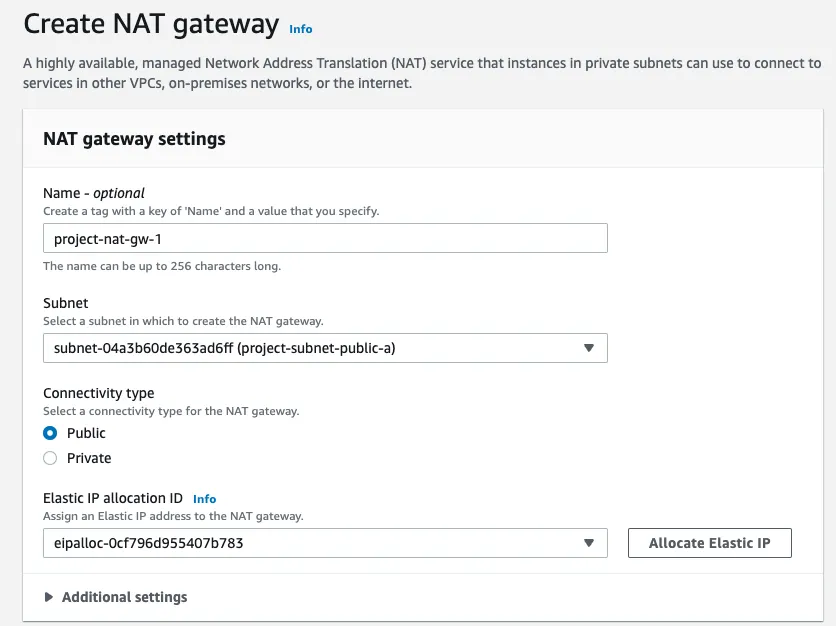
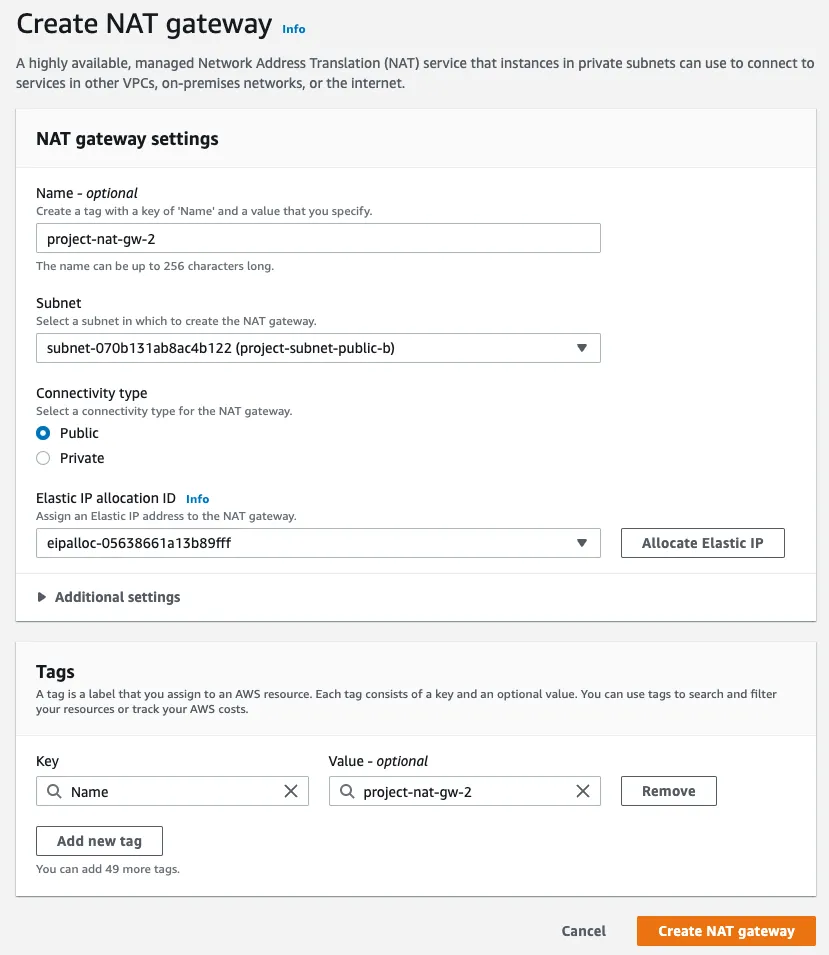
Click on Allocate Elastic IP and finalize by clicking on Create NAT gateway for each NAT Gateway.
- Create Route Tables and configure subnet associations
Navigate to the VPC page in AWS Management Console, go to Route tables, and click Create Route table.
You should create three route tables named: project-public-rt and project-private-rt-a,and project-private-rt-b.
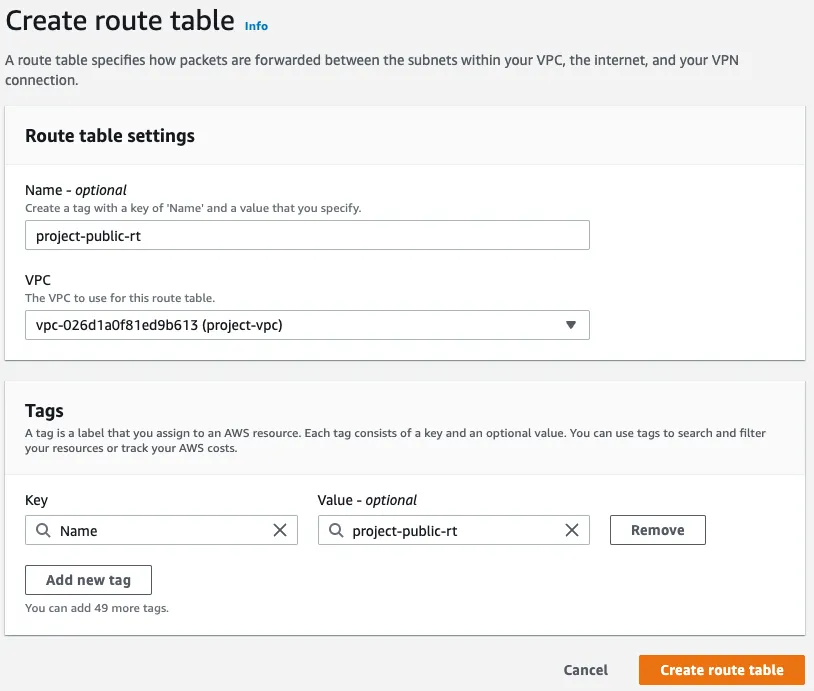
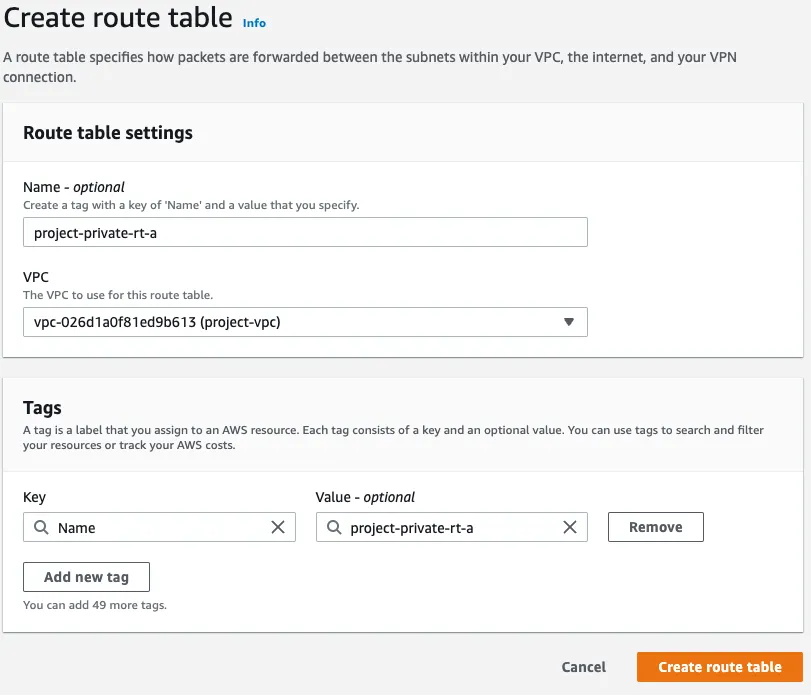
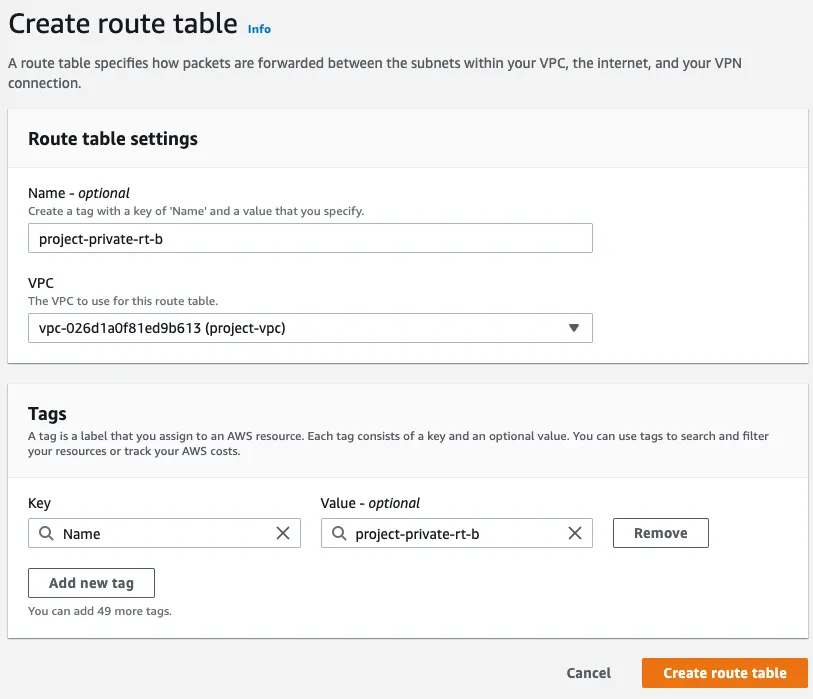
Now, you should associate each route table created with the specific subnet.
In the route tables page, click on project-public-rt, then open Subnet associations and click on Edit subnet associations.
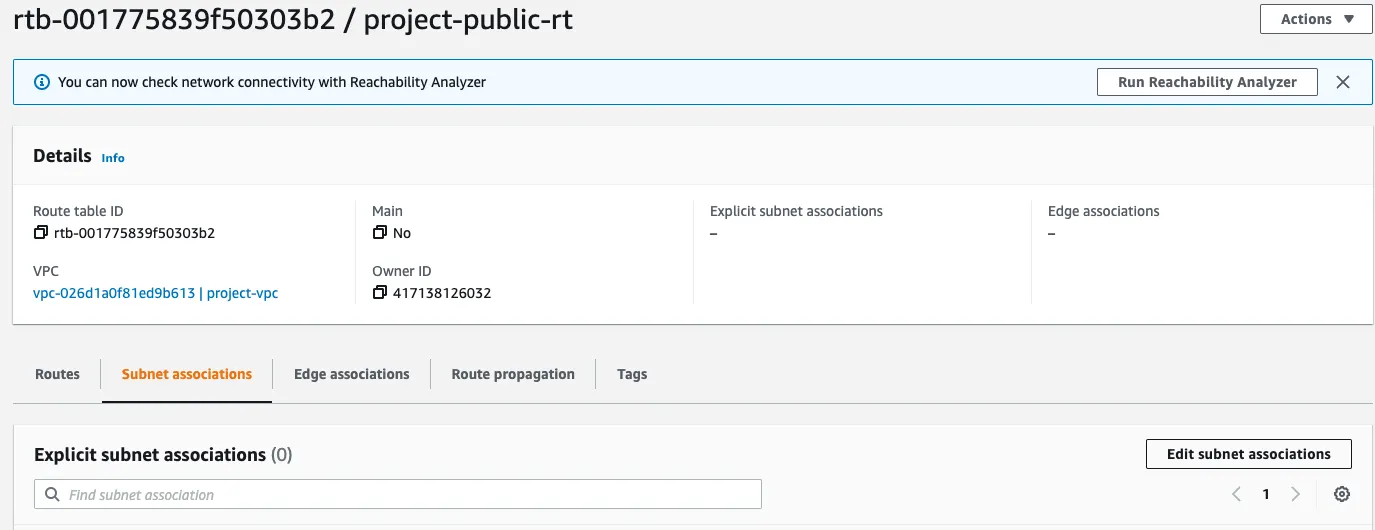
You should now select the public subnets and click on Save associations:
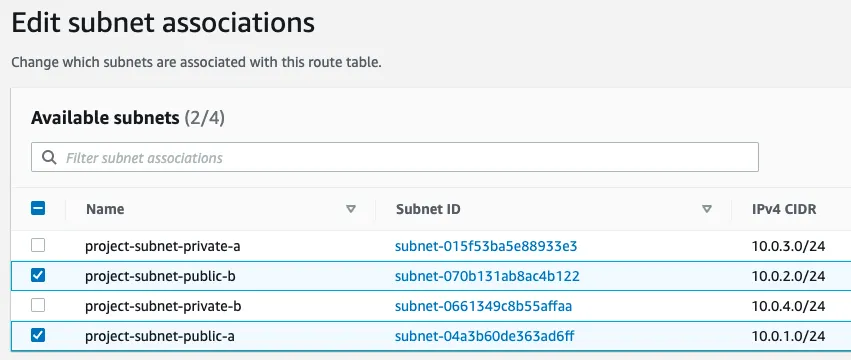
Repeat the process for the route table project-private-rt-a and associate the project-subnet-private-a.
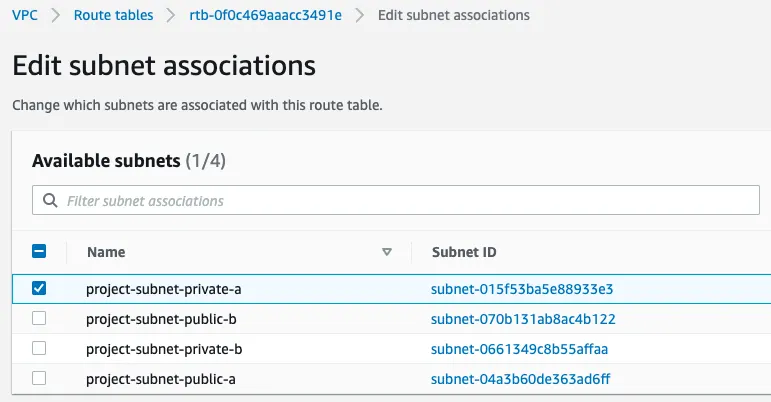
Do the same for project-private-rt-b and associate the project-subnet-private-b.
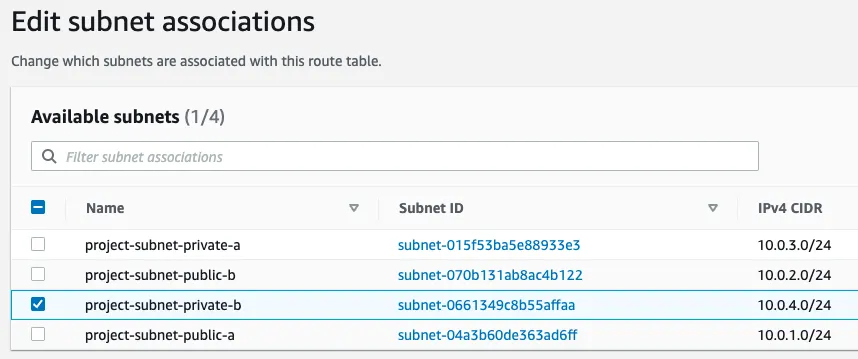
- Configure Routes
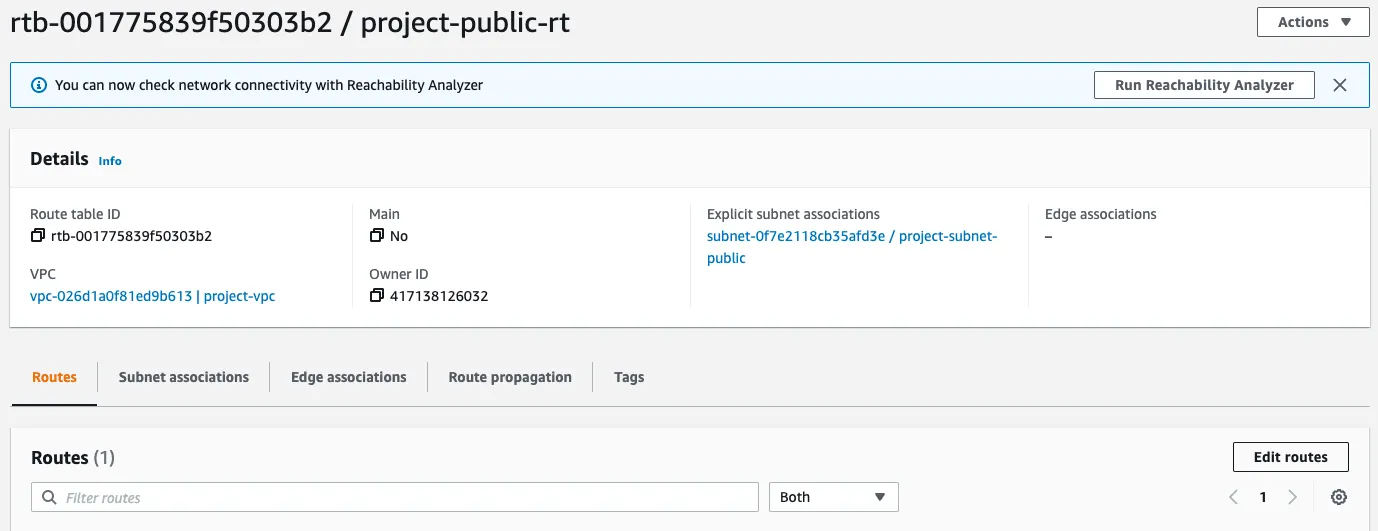
Still in the project-public-rt, inthe Routes tab, click on Edit routes:
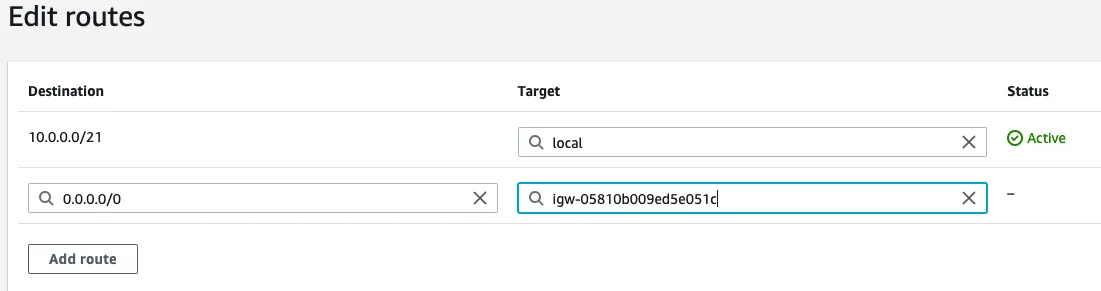
Let’s add a new route now. Enter 0.0.0.0/0as the destination, and select the Internet Gateway as the target (which we created in step 5).
For project-private-rt-a, create a new route and enter 0.0.0.0/0as the destination, and then, select project-nat-gw-1 as the target (from the NAT Gateway we created in step 6).
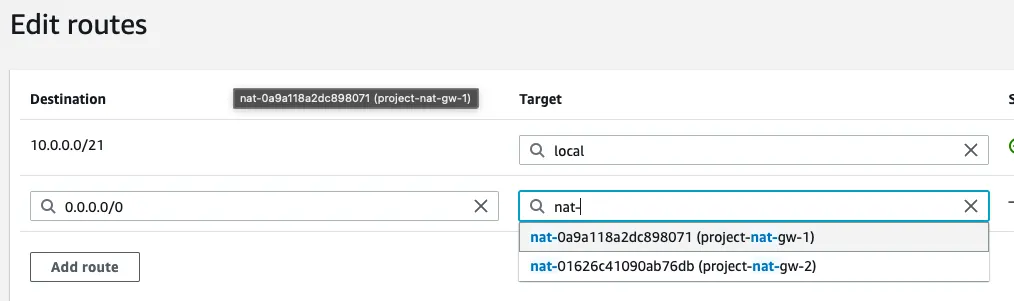
Repeat the process for project-private-rt-b and select project-nat-gw-2.
- Create Application Load Balancer
Navigate to the EC2 page in AWS Management Console, go to Load Balancers, and click Create load balancer.
Select the Application Load Balancer as yourLoad Balancer Type and name it project-alb. The scheme should be Internet Facing, and the load balancer should be in the VPC we created with the mapping for our public subnet named project-subnet-public.
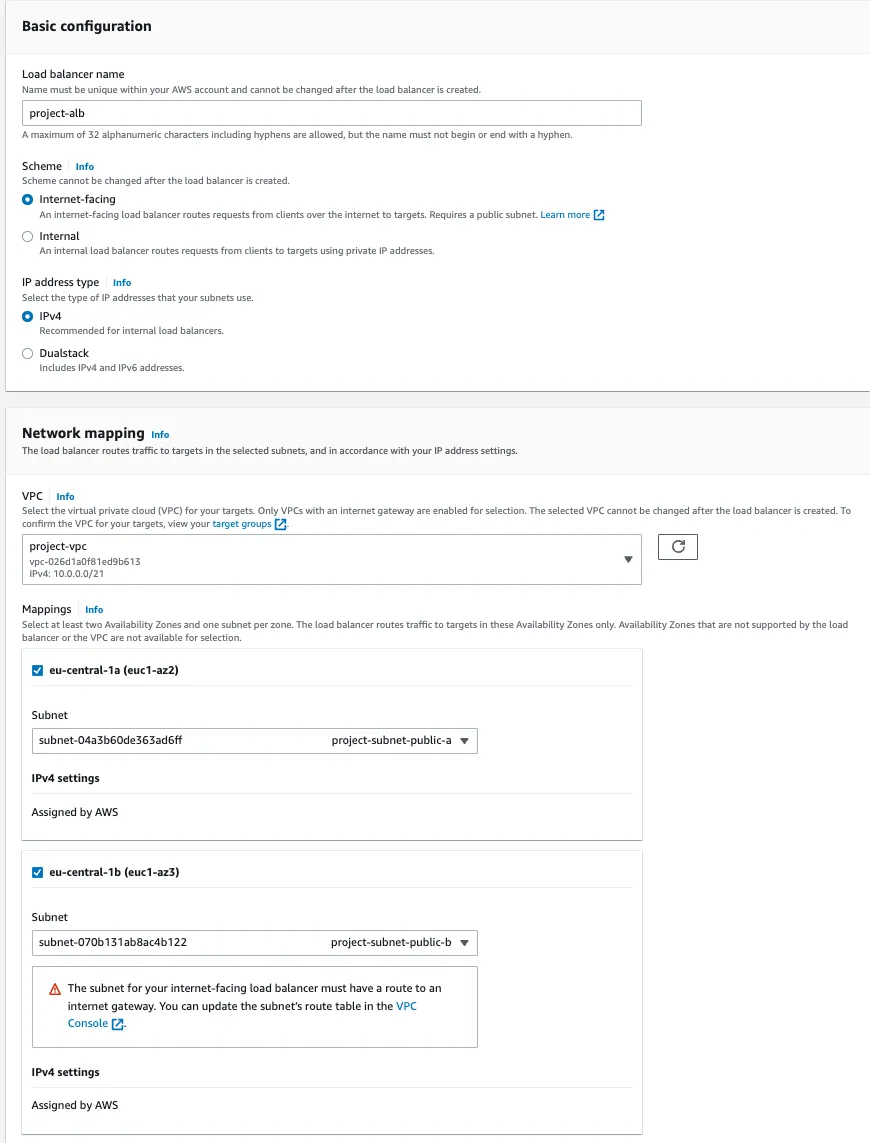
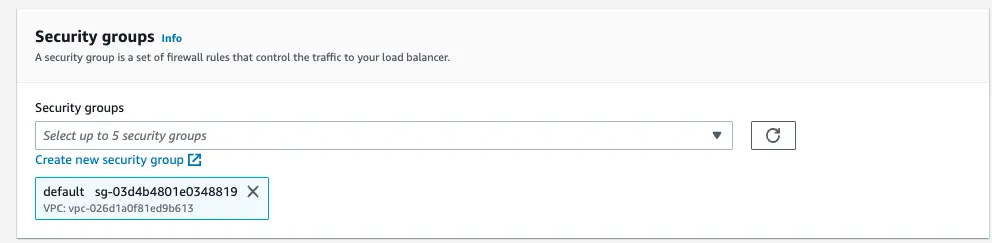
On the Security Groups stage, click on Create new security group:
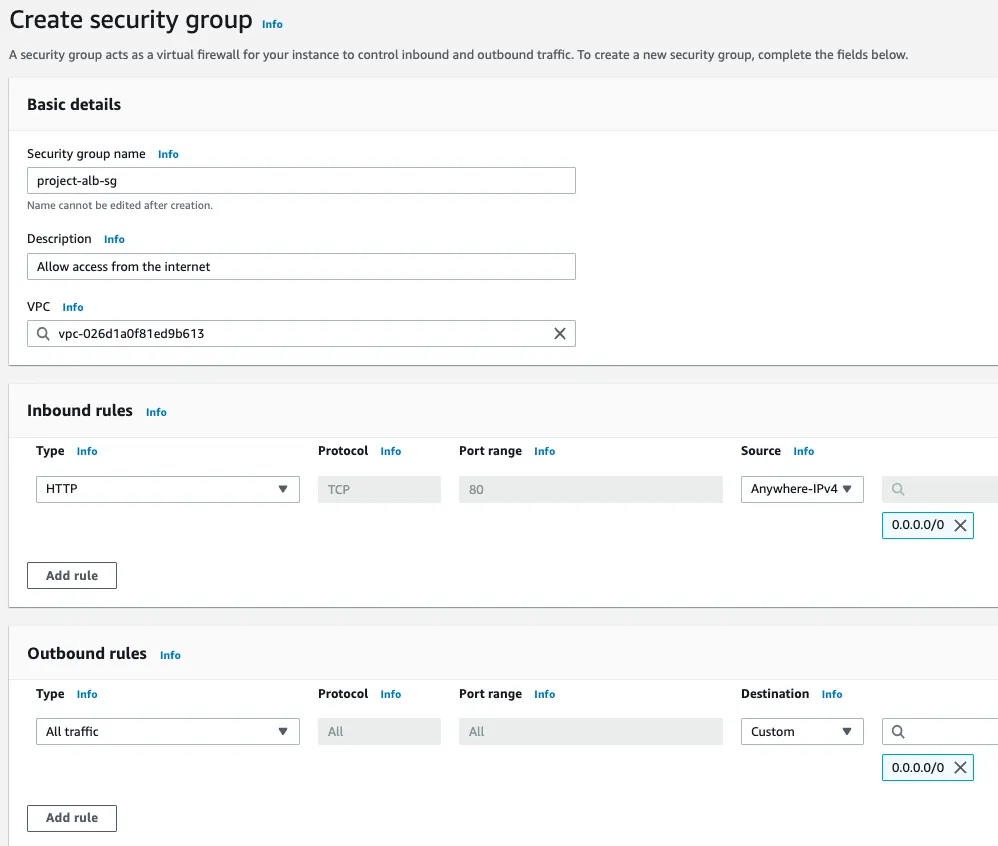
Name it project-alb-sg. Make sure you select the project-vpc as VPC.
In the Inbound rules, you should add one HTTP type of rule with the source Anywhere-IPv4. This basically will allow all HTTP traffic from the internet to your Load Balancer.
Click on Create Security Group.
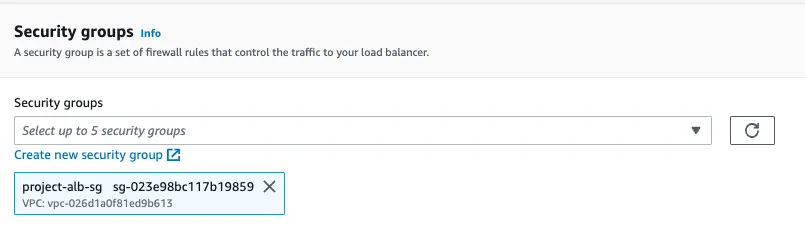
Go back to the Load Balancer creation page and click on the refresh button on the Security Groups stage and click on the Security Group you just created.
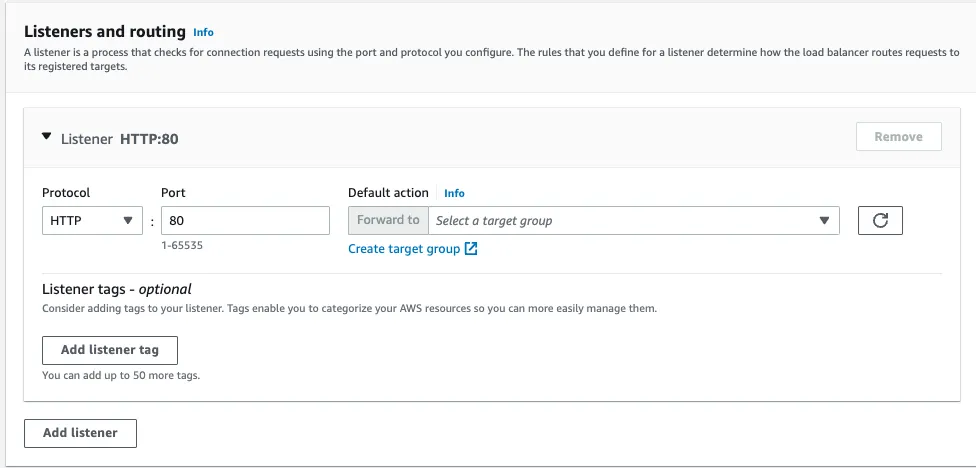
On the Listeners and routing stage, click on Create target group:
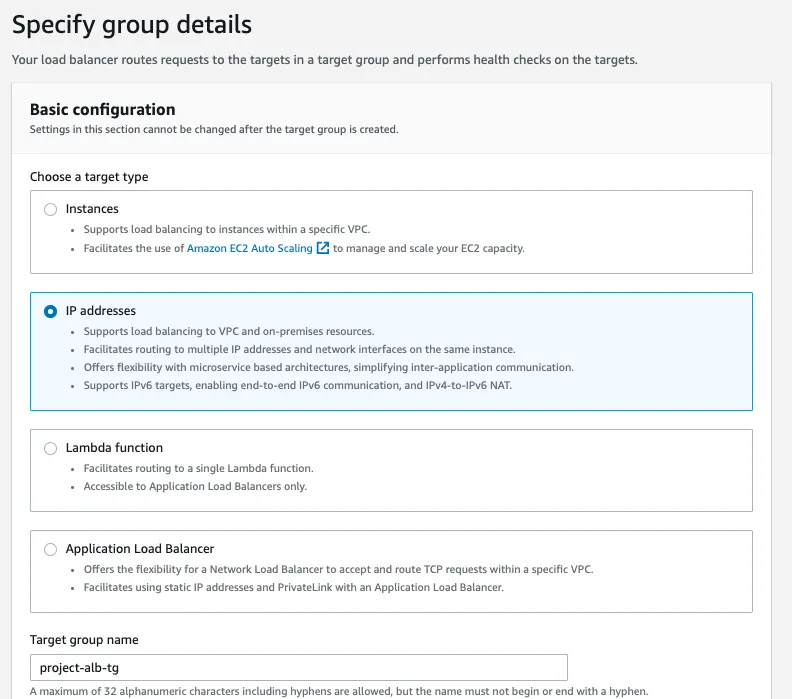
Choose IP addresses as target type,name the target group project-alb-tg and click Next. On the next page, click on Create target group:
Go back to the Load Balancer creation page. On the Listeners and routing stage, click on the refresh button. Then, click on the Target Group you just created.
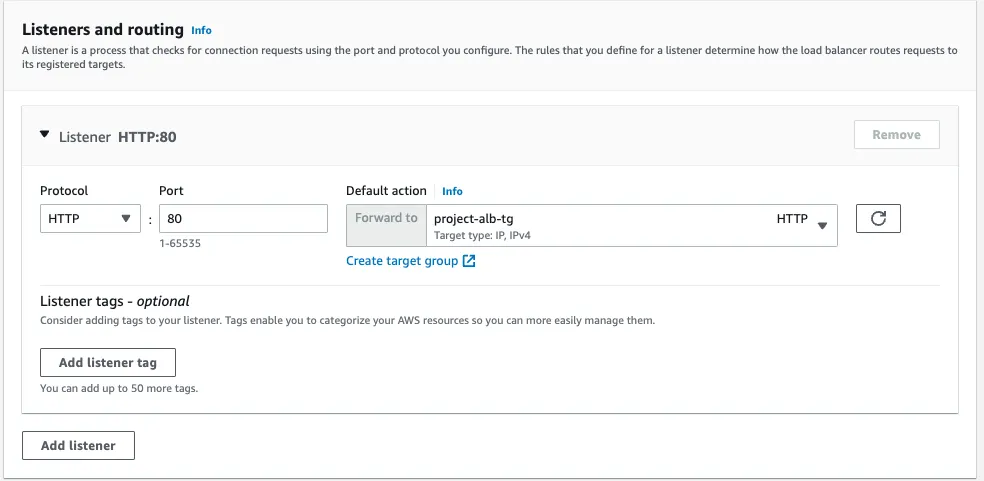
In the Summary section, you should have something like the image below shows.
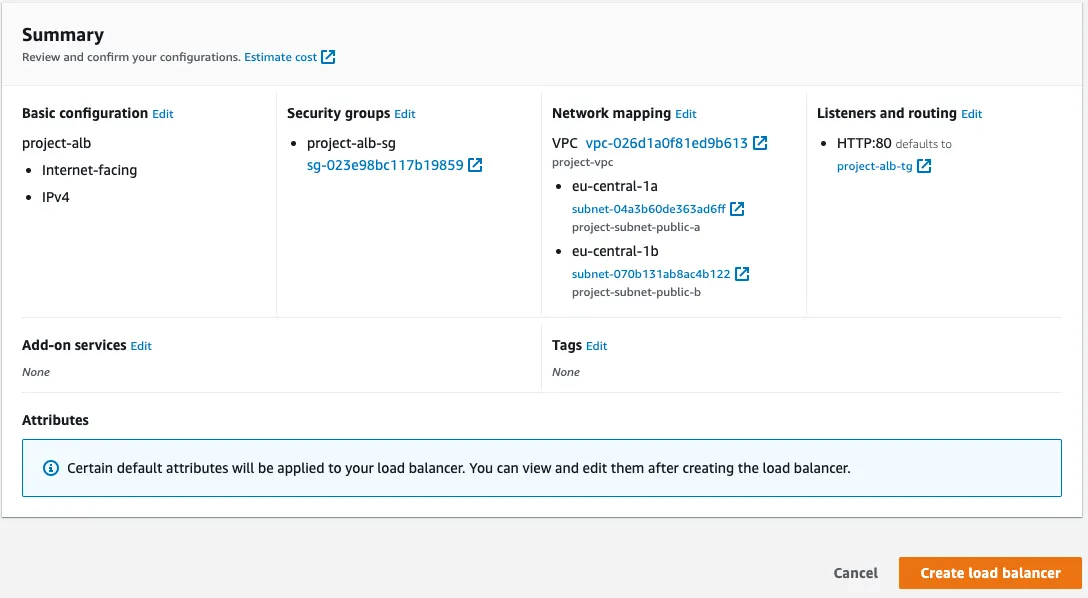
To finalize click on Create load balancer.
You’re almost done!
In Part 3, we will create our ECS Cluster and finally deploy our application.
Stay tuned!
You can find this code also on my GitHub: https://github.com/filipegalo/flask-nginx/
And if you enjoy my content or if you have any questions, feel free to connect with me on Twitter: https://twitter.com/AutomationForge